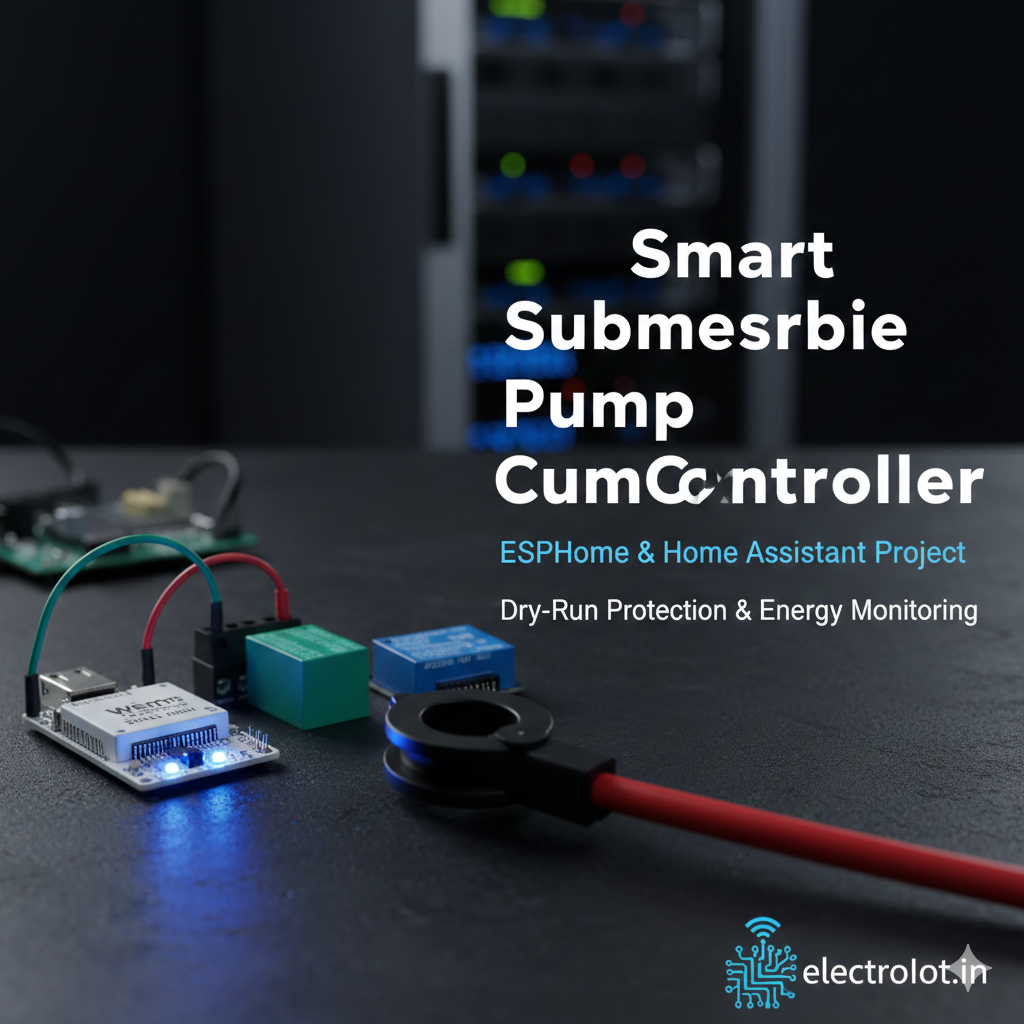
Welcome back to ElectroIoT.in! Today, we are tackling a common problem: manually operating a heavy-duty submersible pump. We will build a smart IoT Starter using a Wemos D1 Mini (ESP8266) that allows you to start and stop your pump from anywhere in the world.
We have designed this guide in two phases:
-
Phase 1: Basic Control (Relays only).
-
Phase 2: Pro Monitoring (Adding the PZEM-004T for Dry-Run protection and Energy tracking).
🛠 Hardware Required
-
Wemos D1 Mini (ESP8266)
-
2-Channel Relay Module (5V)
-
PZEM-004T V3.0 (Optional for Phase 2)
-
Hi-Link HLK-PM01 (5V Isolated Power Supply)
-
Submersible Pump Motor Starter (Standard single-phase)
🛑 Important Safety Note
Working with 230V AC is dangerous. Ensure the main power is disconnected before opening your pump starter box. Capacitors can hold a charge—be careful!
Phase 1: Basic Smart Control (Relay Only)
This setup mimics the physical “Start” and “Stop” buttons on your panel using two relays.
Wiring Logic:
-
Relay 1 (Start): Connected in Parallel with the Green button.
-
Relay 2 (Stop): Connected in Series with the Red button (using the Normally Closed terminal).
ESPHome Code (Phase 1)
esphome:
name: shop-waterpump
friendly_name: Shop Waterpumpesp8266:
board: d1_minilogger:
wifi:
networks:
– ssid: “YOUR_SSID”
password: “YOUR_PASSWORD”api:
encryption:
key: “YOUR_ENCRYPTION_KEY”switch:
– platform: gpio
pin: D1
id: relay_start
name: “Start Pump”
inverted: true
restore_mode: ALWAYS_OFF
on_turn_on:
– delay: 2s
– switch.turn_off: relay_start– platform: gpio
pin: D2
id: relay_stop
name: “Stop Pump”
inverted: true
restore_mode: ALWAYS_OFF
on_turn_on:
– delay: 2s
– switch.turn_off: relay_stop
Dashboard Code (Phase 1)
type: horizontal-stack
cards:
– type: tile
entity: switch.shop_waterpump_start_pump
name: START
color: green
icon: mdi:play
– type: tile
entity: switch.shop_waterpump_stop_pump
name: STOP
color: red
icon: mdi:stop
Phase 2: The “Pro” Upgrade (Adding PZEM-004T)
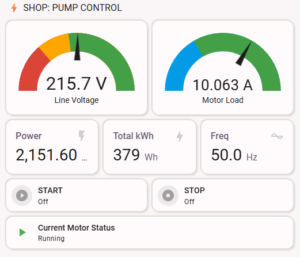
Now, let’s make it truly smart. By adding the PZEM-004T, we get real-time Voltage, Current, and Watts. This allows us to detect a Dry Run (if the water level is too low, the current drops) and shut off the motor automatically to save it from burning.
Wiring the PZEM:
-
Wemos D5 (RX) -> PZEM TX
-
Wemos D6 (TX) -> PZEM RX
-
CT Coil: Clamp around the Main Red Wire going to the motor.
ESPHome Code (Phase 2 – Full Feature)
# Add this UART section to the code above
uart:
rx_pin: D5
tx_pin: D6
baud_rate: 9600sensor:
– platform: pzemac
address: 1
voltage:
name: “Pump Voltage”
current:
name: “Pump Amps”
id: pump_amps
# DRY RUN PROTECTION: Auto-stop if amps are too low
on_value_range:
– below: 1.0
then:
– if:
condition:
binary_sensor.is_on: pump_running_status
then:
– switch.turn_on: relay_stop
power:
name: “Pump Watts”
energy:
name: “Pump Total Energy”
frequency:
name: “Pump AC Frequency”# Virtual status based on power draw
binary_sensor:
– platform: template
name: “Pump Running Status”
id: pump_running_status
device_class: running
lambda: |-
return id(pump_amps).state > 0.5;
🎨 Professional Dashboard (Phase 2)
This code creates a high-visibility control center with live gauges and large buttons.
type: vertical-stack
cards:
– type: heading
heading: “⚡ JSR Studio Pump Control”
– type: grid
columns: 2
square: false
cards:
– type: gauge
entity: sensor.shop_waterpump_pump_voltage
name: Voltage
min: 160
max: 270
severity:
green: 210
yellow: 190
red: 0
– type: gauge
entity: sensor.shop_waterpump_pump_amps
name: Motor Load
max: 12
severity:
green: 1
yellow: 8
red: 10
– type: grid
columns: 3
square: false
cards:
– type: entity
entity: sensor.shop_waterpump_pump_watts
– type: entity
entity: sensor.shop_waterpump_pump_total_energy
– type: entity
entity: sensor.shop_waterpump_pump_ac_frequency
– type: horizontal-stack
cards:
– type: tile
entity: switch.shop_waterpump_start_pump
color: green
name: START
– type: tile
entity: switch.shop_waterpump_stop_pump
color: red
name: STOP
✨ GITHUB Code
https://github.com/ElectroIoT/Smart-Submersible-Pump-Controller-ESPHome
✨ Conclusion
Whether you build the basic or the pro version, this project is a game-changer for home automation. You no longer need to walk to the pump panel to check if there is enough voltage or if the water has started flowing!
Found this helpful? Share your build on social media and tag ElectroIoT.in!